How to Create Tags for Your Facebook Contacts Using ChatSilo
This tutorial walks you through creating tags in ChatSilo to help you organize and manage your Facebook contacts more efficiently.
Step 1: Open ChatSilo Inside Facebook Messages
Navigate to facebook.com/messages in your browser. Once you're there, launch the ChatSilo extension by clicking its icon in the top-right corner of your browser toolbar.
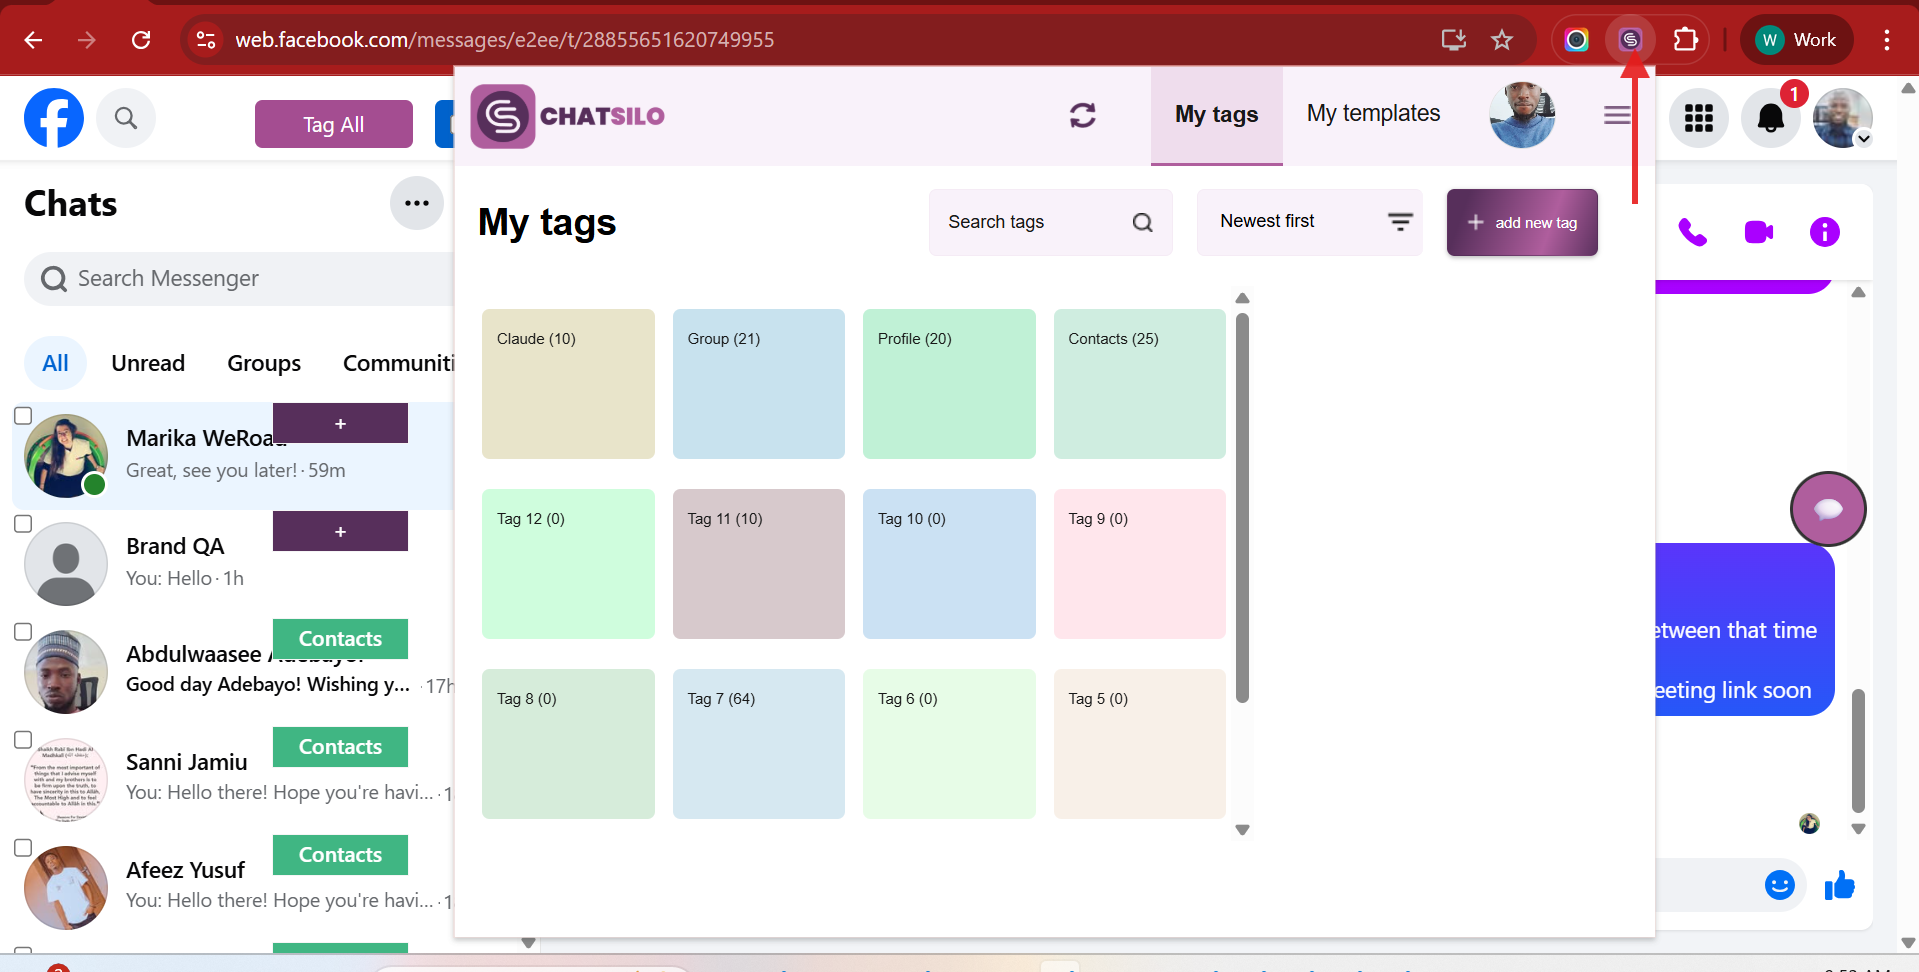
Note: Make sure you're already logged into your Facebook account before launching the extension. ChatSilo needs to be active on facebook.com/messages to work correctly.
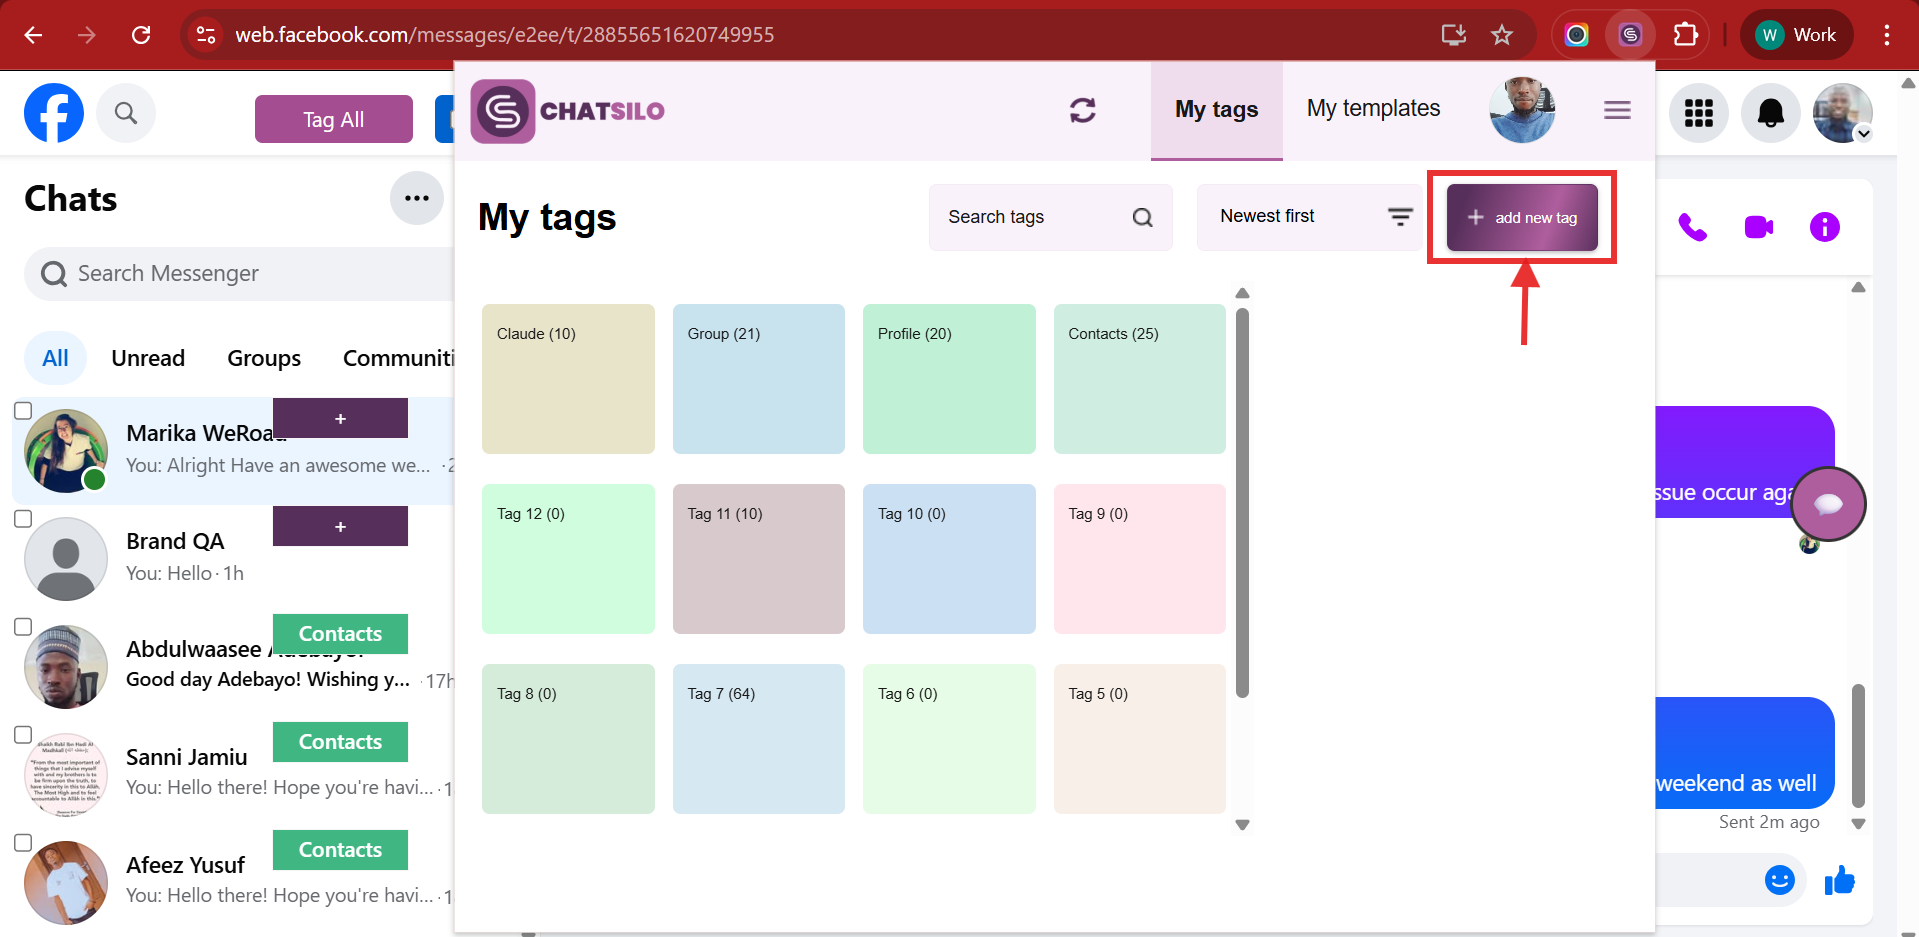
Step 2: Click "Add New Tag"
Inside the ChatSilo extension panel, locate and click the Add New Tag button.
Step 3: Enter a Tag Name and Confirm
In the input field that appears, type your desired tag name — for example, "New Leads". When you're done, click the Add button to save it.
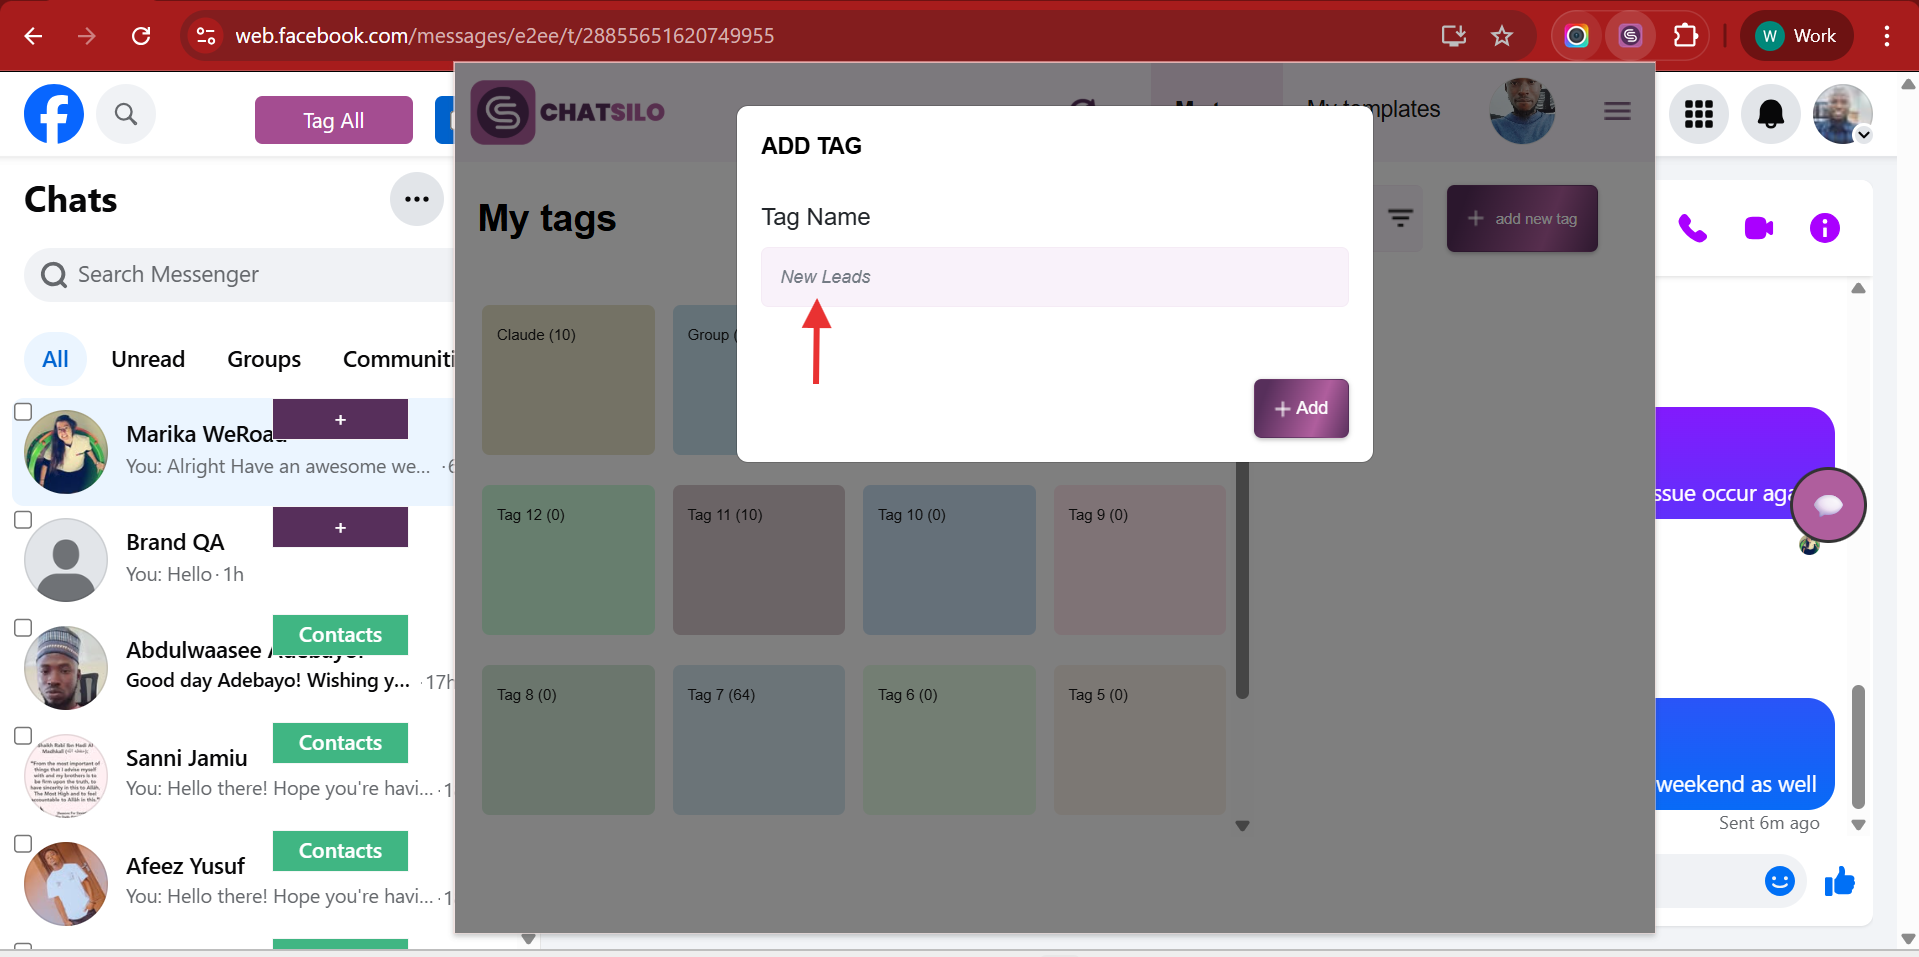
Note: Choose tag names that are short and descriptive so they're easy to identify and apply to contacts later.
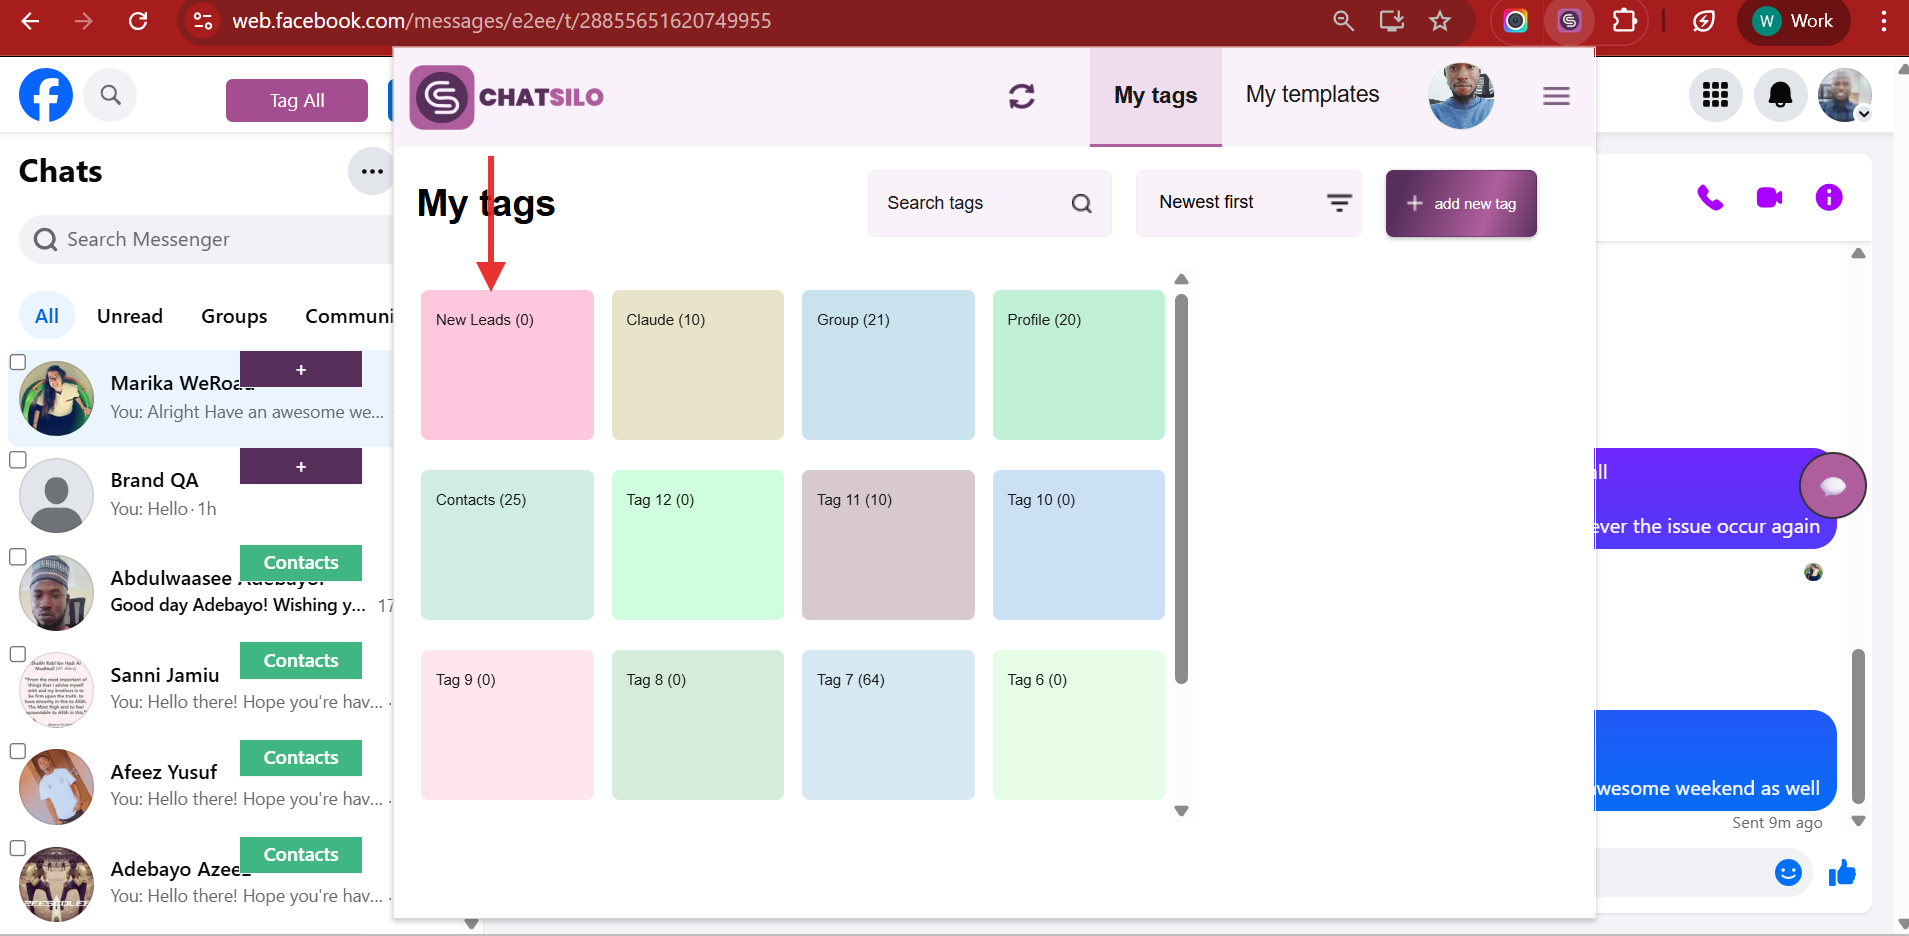
Step 4: Verify Your New Tag
To confirm the tag was created successfully, check the Tags section within the ChatSilo extension panel. Your new tag should now appear in the list.
You're all set! 🎉
You've successfully created a new contact tag using the ChatSilo extension. You can now start applying this tag to your Facebook contacts at facebook.com/messages to keep your conversations organized and your workflow on track.